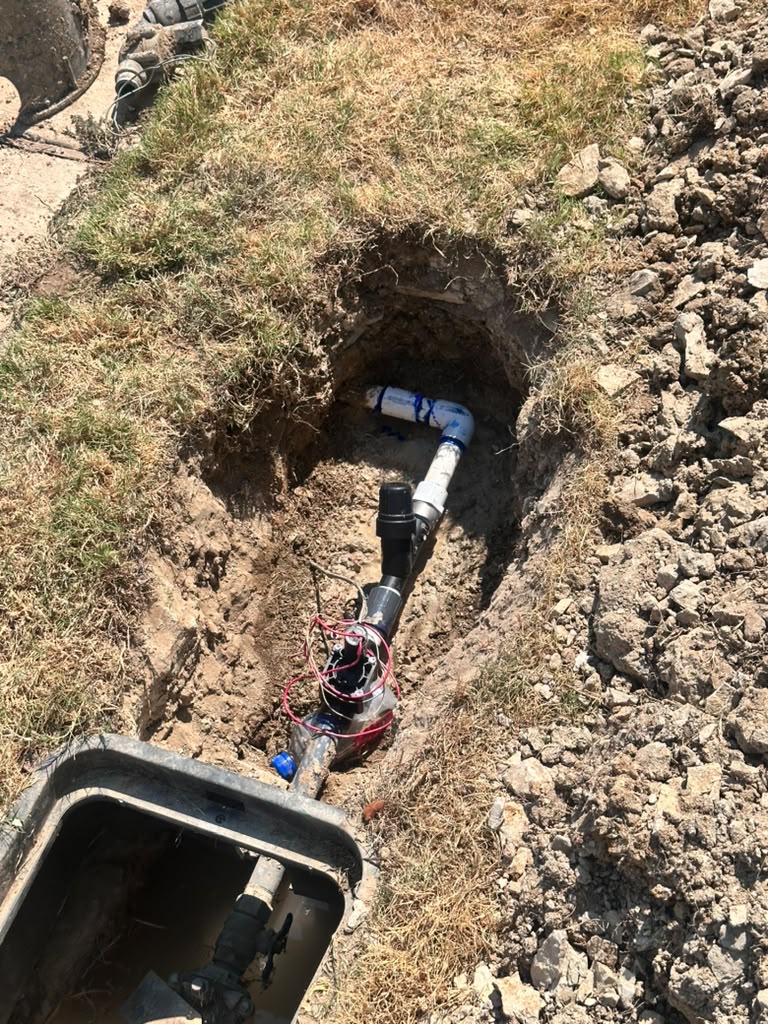
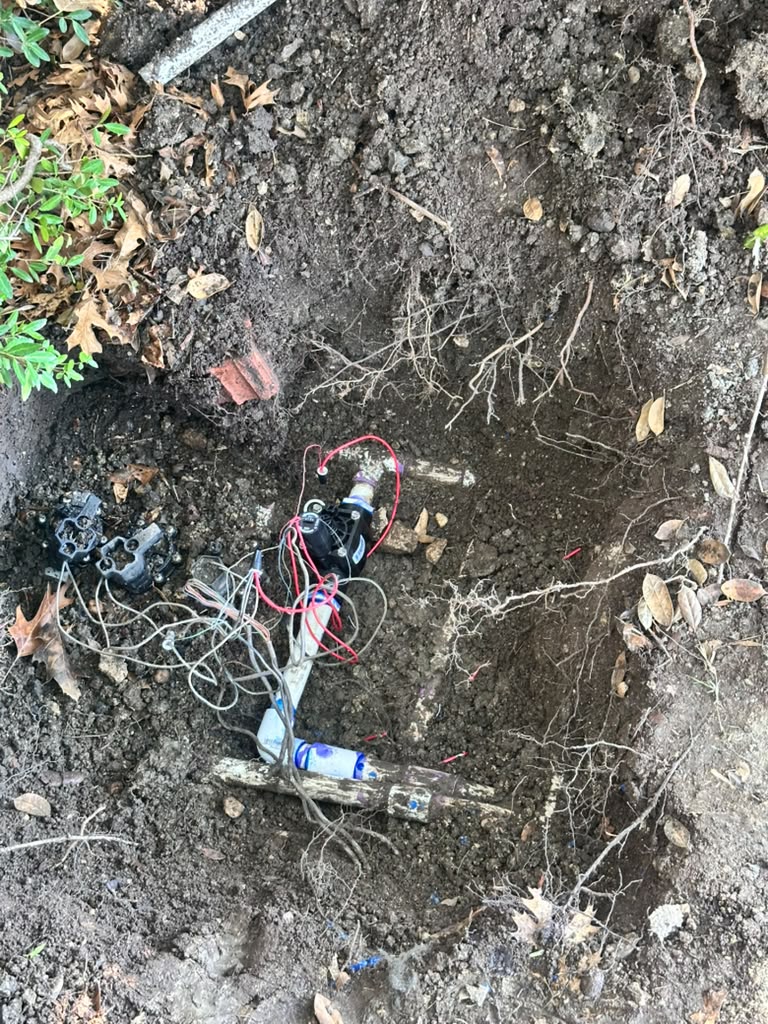
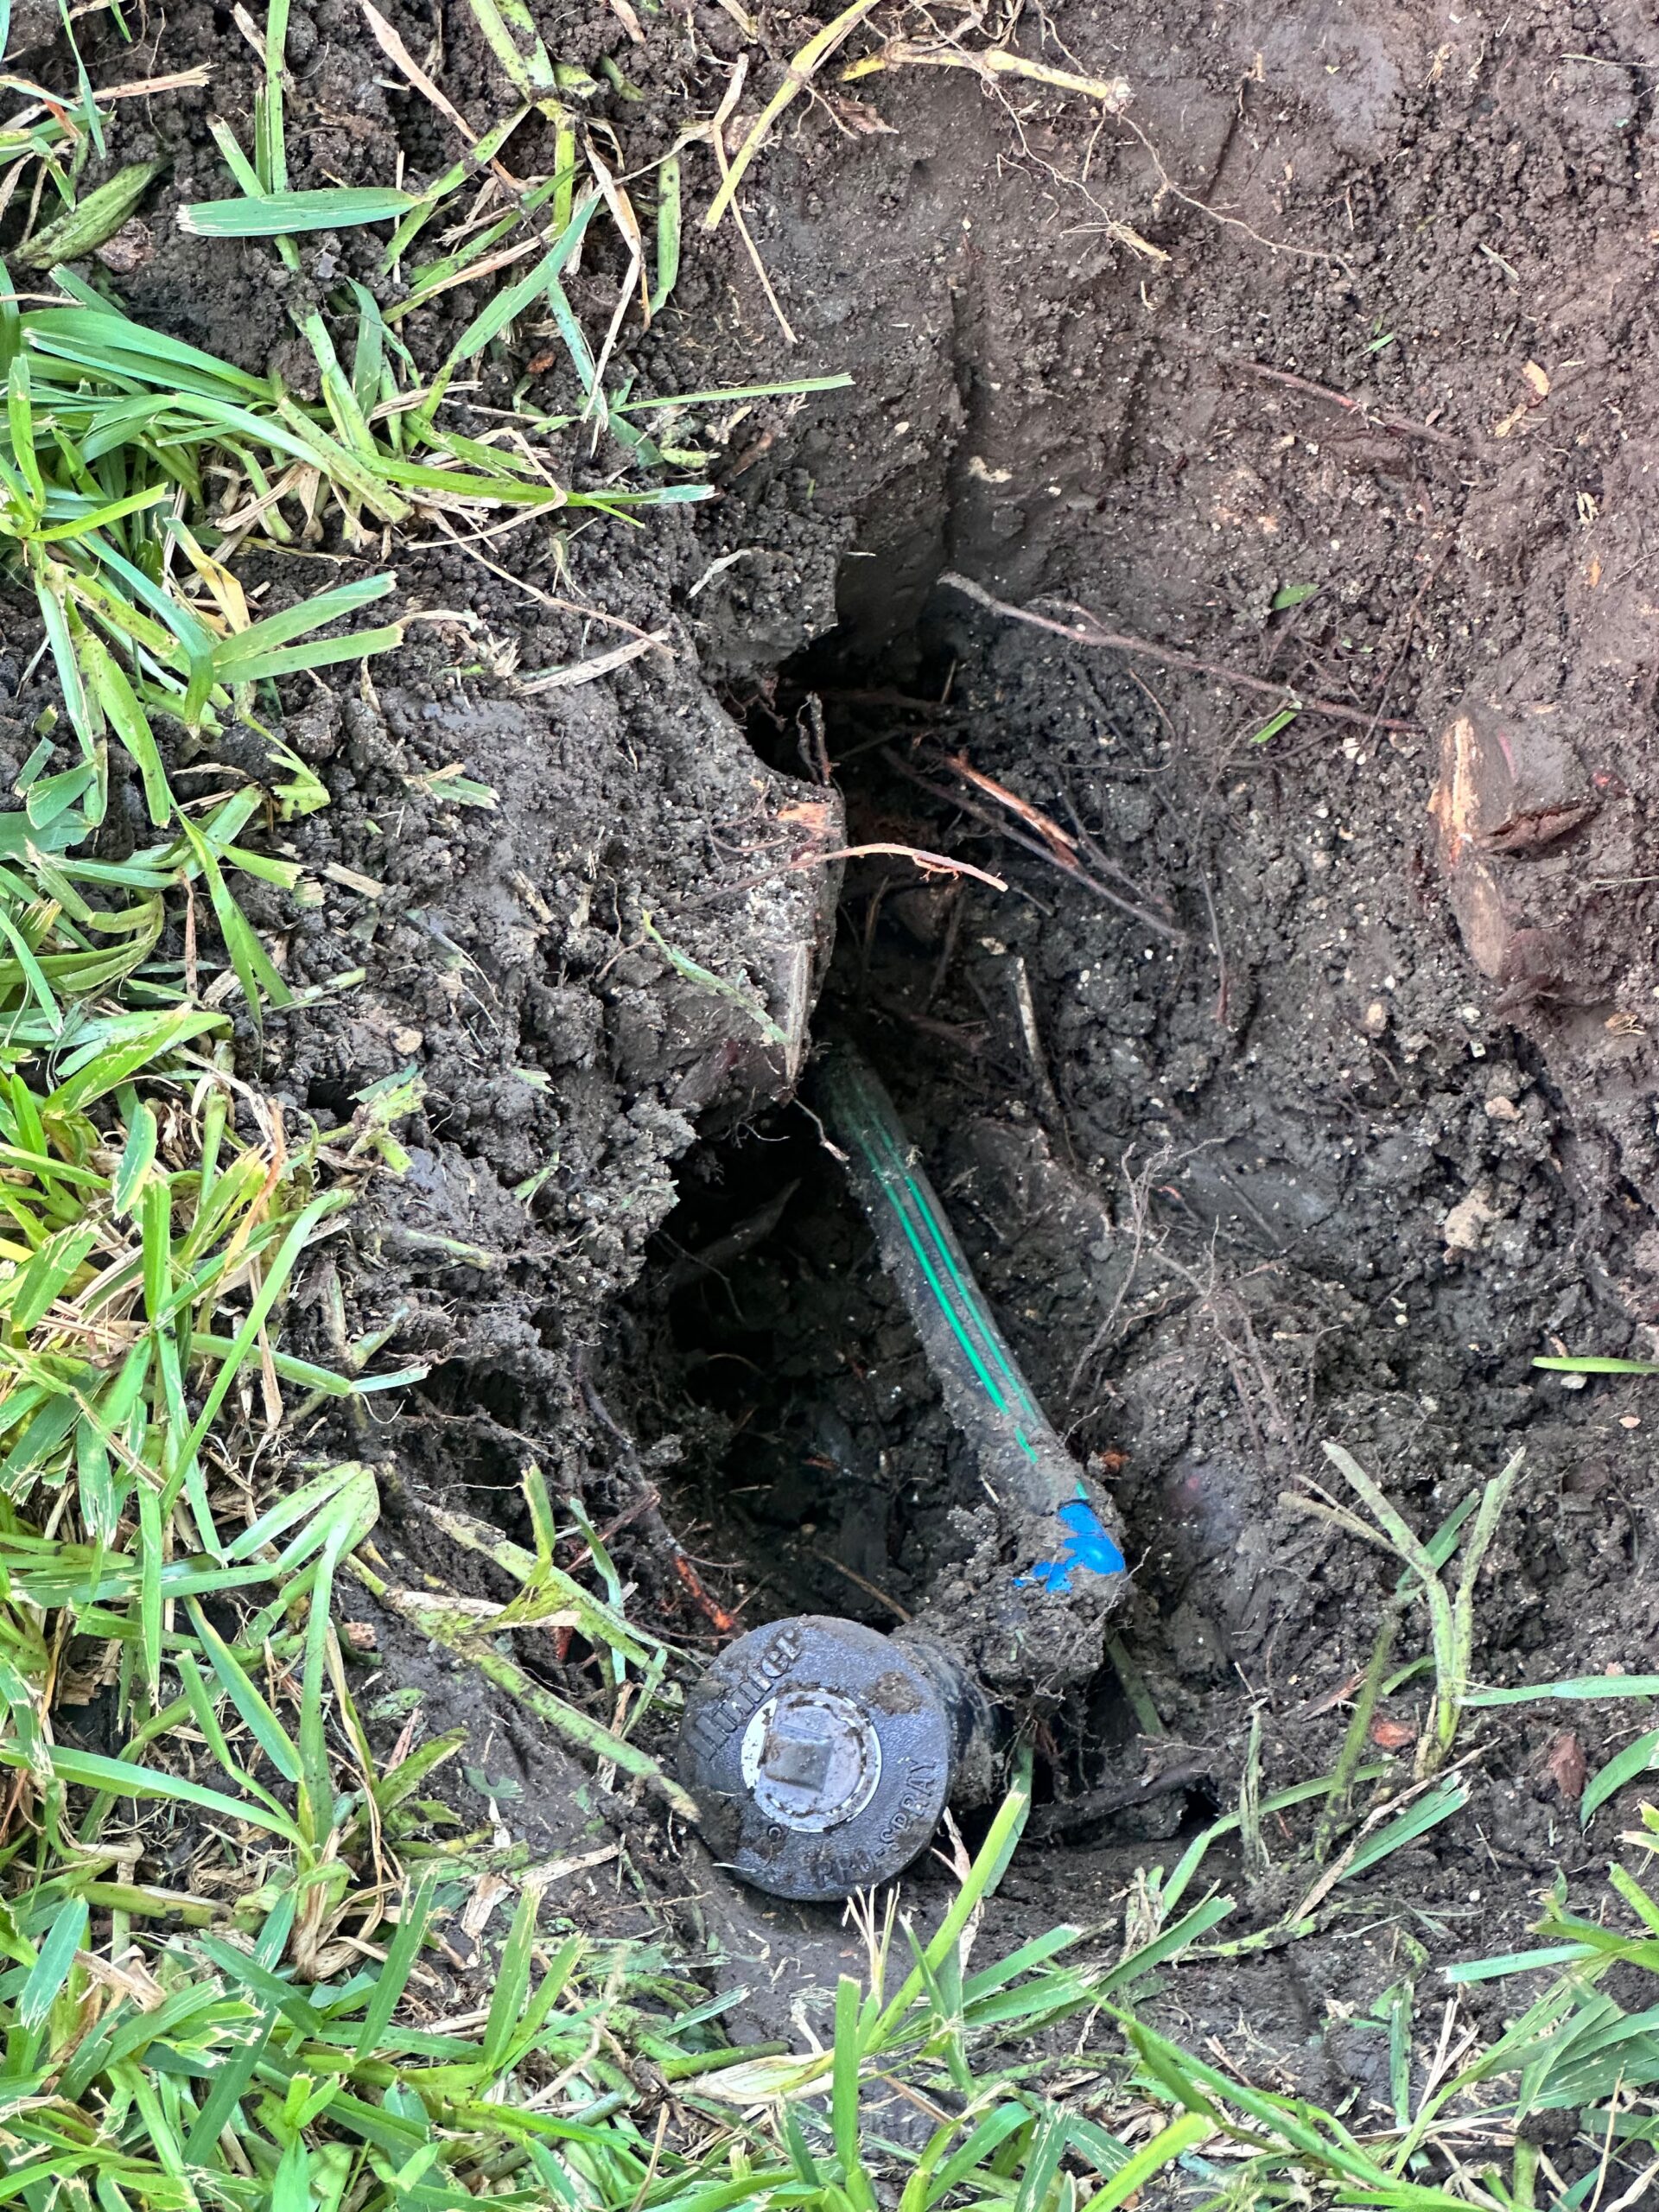
If a sprinkler won’t turn on in Anna TX but the other zones work normally, the problem is usually isolated to that zone’s valve, solenoid, or electrical wiring rather than the controller. The controller may be sending the correct signal, but a damaged wire, failed solenoid, stuck valve, or blocked water passage can prevent that zone from operating.
Before replacing the controller or other components, check the affected zone manually, inspect its valve box, and look for visible wiring or water-flow problems. Identifying where the signal or water stops can help prevent unnecessary repairs and replacement costs.
At a Glance: Single-Zone Sprinkler Problems
| Category | Details |
| Difficulty | Easy for basic visual checks; electrical testing requires experience |
| Estimated Time | 15–30 minutes for initial inspection |
| Tools Needed | Screwdriver, flashlight, controller manual, optional multimeter |
| Works For | One sprinkler zone that will not activate |
| May Not Solve | Underground pipe damage, extensive wiring problems, or damaged valve assemblies |
Important: Turn off the irrigation system before opening electrical connections or attempting repairs. Avoid handling exposed wiring while the system is powered.
Why Does One Sprinkler Zone Stop Working?
An automatic sprinkler system operates through several connected components. The controller sends an electrical signal through the wiring to a specific valve, which opens and allows water to travel through underground pipes to the sprinkler heads.
Each zone generally has its own valve and solenoid. The solenoid is the small electrical component attached to the valve that controls its opening and closing.
When one zone stops working while the others continue operating, the problem is often somewhere along this individual pathway.
Here are the most common reasons:
1. A Faulty Sprinkler Valve Solenoid
Homeowners can start with basic checks and controller adjustments. However, if a zone remains inactive, the valve will not open, or wiring and solenoid problems are suspected, professional troubleshooting is recommended. A licensed irrigation professional can test the system, identify the faulty component, and recommend appropriate repairs before unnecessary replacements.
2. Damaged or Disconnected Sprinkler Wiring
Sprinkler wiring connects the controller to each zone valve. Cut, disconnected, or corroded wires can prevent the electrical signal from reaching the solenoid. Damage may occur during landscaping, digging, edging, or fence installation. Look for disturbed soil, exposed wires, corroded connections, or zones that stopped working after yard work. Since underground wiring damage may not be visible, a professional electrical test can help locate the interruption and prevent unnecessary digging or component replacement.
3. A Stuck or Clogged Sprinkler Valve
Even when the solenoid receives an electrical signal, debris, mineral deposits, or a damaged diaphragm can prevent the valve from opening. Symptoms include weak water flow, inconsistent operation, or no water reaching the zone. Cleaning or replacing damaged components may restore proper operation.
4. A Partially Closed Water Supply
Although one-zone problems are usually associated with that zone’s components, a restricted water supply can also affect operation. Check whether the irrigation system’s main shut-off valve is fully open. If a separate valve controls the affected section, verify that it has not been accidentally closed. Do not force a shut-off valve that feels stuck. Forcing it can damage the component or cause a leak.
5. A Controller Station or Programming Problem
A working controller does not guarantee that every sprinkler station is programmed correctly. The affected zone may have no assigned watering days, zero runtime, an incorrect start time, a disabled station, or a loose wiring connection. Use the controller’s manual station testing feature to check whether the zone activates independently of its regular watering schedule.
How to Diagnose a Sprinkler Zone That Won’t Turn On
Before replacing a solenoid, valve, or controller, follow these basic troubleshooting steps.
Step 1: Run the Affected Zone Manually
Start by checking whether the problem occurs during scheduled watering or manual operation.
Go to your sprinkler controller and select the affected zone. Activate it manually and allow a few minutes for the system to respond.
Observe what happens:
- If the zone activates, check the watering schedule and programming.
- If the zone remains inactive, investigate the valve, solenoid, and wiring.
- If the controller displays an error, consult the manufacturer’s instructions.
This first check helps separate a programming issue from a possible equipment problem.
Step 2: Compare It With Other Working Zones
Run another zone using the same controller.
If the other zones activate normally, this provides useful information. It suggests that the controller has power and the main water supply is available.
However, it does not completely rule out a faulty station terminal or damaged connection affecting only the nonworking zone.
Record which zones operate and which do not. This information can help narrow down the problem.
Step 3: Inspect the Valve Box
Locate the valve box associated with the affected zone. It is usually covered by a green or black plastic lid installed at ground level.
Carefully remove the lid and look for visible problems.
Check for:
- Standing water inside the box.
- Loose or disconnected wires.
- Corroded wire connectors.
- Cracked valve components.
- Visible dirt or debris.
A flooded valve box may indicate a leak or drainage problem. Avoid pulling apart electrical connections if water is present.
Step 4: Check Whether the Valve Opens Manually
Some sprinkler valves have a manual bleed screw or a solenoid that can be turned to open the valve without using the controller.
Only attempt this if you can identify the correct component and understand the manufacturer’s instructions.
If manually opening the valve allows water to reach the sprinkler heads, the water supply and valve’s mechanical operation may be functioning. The problem is more likely electrical, involving the solenoid, wiring, or controller output.
If water does not flow, the problem may involve a closed supply, clogged valve, damaged diaphragm, or another water-flow restriction.
Close the valve properly after testing to prevent unwanted watering.
Step 5: Have the Wiring and Solenoid Tested
If the previous checks do not identify the problem, electrical testing can help determine whether the solenoid or wiring is responsible.
A qualified technician can use a multimeter to check electrical continuity and verify whether the controller is sending the appropriate signal.
The results can help identify:
- A failed solenoid.
- A broken or disconnected zone wire.
- A corroded underground connection.
- A faulty controller station output.
Testing the circuit before replacing components is important because a new solenoid will not solve a damaged wire.
Common Mistakes to Avoid When Troubleshooting
Replacing sprinkler components without confirming the cause can create additional expenses.
Avoid these common mistakes:
Replacing the entire controller immediately. If other zones work, the controller may still be functioning correctly. Check the affected station and its connections first.
Assuming every valve problem requires a new valve. Sometimes cleaning debris or correcting a loose connection is enough.
Pulling underground wires without testing. Digging without identifying the damaged section can create additional problems.
Ignoring water inside the valve box. Standing water may indicate a leak or drainage issue that needs separate attention.
Forcing the solenoid or valve. Excessive force can damage internal components and make the original problem worse.
A systematic diagnosis is usually more effective than replacing parts based on symptoms alone.
Local Considerations for Sprinkler Systems in Anna TX
Sprinkler systems in Anna and other North Texas communities experience seasonal changes that can affect their performance.
Heat and Soil Movement
Hot summer conditions can dry out the soil, while changing moisture levels can cause North Texas clay soil to expand and contract.
Over time, soil movement may place stress on underground irrigation pipes, fittings, and electrical connections.
Landscaping activities can also disturb buried sprinkler wiring or damage pipes.
Cold Weather and Freeze Damage
North Texas occasionally experiences freezing temperatures that can affect exposed irrigation components.
Water left inside vulnerable pipes, backflow preventers, and other above-ground components may freeze and expand. This can lead to cracks, leaks, or damaged fittings.
If a zone stops working after a cold period, inspect the system for visible damage before running it repeatedly.
Seasonal Watering Changes
Anna homeowners may adjust their watering schedules throughout the year because of rainfall, temperature changes, and local watering requirements.
If the controller works but a zone does not activate, check its individual runtime and schedule before assuming that a component has failed.
You can also consult the EPA WaterSense Sprinkler Spruce-Up guide for practical irrigation inspection and maintenance recommendations.
Other Sprinkler Problems That Can Look Like a Failed Zone
Not every sprinkler problem means the valve or wiring has stopped working.
Some symptoms can point to a different issue.
Low Water Pressure
If the affected zone activates but the sprinkler heads barely spray or fail to pop up, the problem may involve low water pressure rather than a failed electrical component.
Possible causes include:
- A partially closed supply valve.
- A damaged underground pipe.
- A leaking connection.
- A restriction inside the irrigation system.
Underground Sprinkler Leaks
A damaged underground pipe can prevent adequate water from reaching sprinkler heads.
Look for unusually wet soil, persistent puddles, or areas that remain soggy when the system is not running.
If you suspect this problem, see our guide to sprinkler leak detection.
Damaged Sprinkler Heads
Sometimes a zone turns on, but individual heads do not distribute water correctly.
A clogged nozzle, broken head, or damaged connection can affect coverage without preventing the entire zone from activating.
Inspect visible heads after confirming that the zone is running.
Other Valve-Related Problems
A valve may open but fail to close properly, causing continuous watering or water movement when the system should be off.
If you notice this behavior, review our sprinkler valve repair resource to understand the possible causes.
When Should You Call a Sprinkler Professional?
Basic visual checks and controller programming adjustments are good starting points for homeowners. However, professional troubleshooting may be necessary if one zone remains inactive after manual testing, the valve will not open, electrical wiring is damaged, or the solenoid needs testing or replacement. Standing water inside the valve box and suspected underground pipe damage also require attention.
A licensed irrigation professional can test the controller output, wiring, solenoid, and valve to identify the actual problem. In Texas, regulated irrigation work should be handled by an appropriately licensed professional to ensure proper diagnosis and repair.
Frequently Asked Questions
1. Why Does Only One Sprinkler Zone Stop Working?
When one zone stops working but the others operate normally, the most likely causes are a faulty solenoid, damaged wiring, or a stuck valve. Check the affected zone manually and inspect its valve box before replacing components.
2. Can a Sprinkler Controller Work Even When One Zone Is Broken?
Yes. A controller can operate normally while an individual zone fails. Each zone has its own electrical connection and valve, so a problem affecting one station may not interrupt the others.
3. How Do I Know If My Sprinkler Solenoid Is Bad?
A faulty solenoid may prevent the valve from responding when the controller activates the zone. However, damaged wiring can cause similar symptoms. Electrical testing can help determine whether the solenoid needs replacement.
4. Should I Replace My Sprinkler Valve If It Won’t Open?
Not immediately. A valve that will not open may have a faulty solenoid, damaged wiring, internal debris, or a mechanical problem. Proper diagnosis helps determine whether cleaning, component repair, or complete valve replacement is necessary.
5. Can Cold Weather Cause a Sprinkler Zone to Stop Working?
Yes. Freezing temperatures can damage exposed components, pipes, fittings, and other irrigation equipment. If a zone stops working after a freeze, inspect for visible damage and have the affected components evaluated before operating the system again.
Next Step: Get the Right Sprinkler Diagnosis
If basic checks do not restore operation, a professional inspection can help identify whether the issue involves the solenoid, wiring, valve, or underground water supply.
The goal is to understand the cause before deciding what needs repair.
Related Resources
Conclusion
If a sprinkler won’t turn on in Anna TX while other zones work, the fault is often isolated to its valve, solenoid, or wiring—not the controller. Start with manual testing and a careful visual inspection before replacing parts. If the cause remains unclear, Whale Done Sprinklers & Irrigation can help identify the problem and explain the repair options. Schedule an assessment at +1 (469) 384-7767 or clientsupport@callwhaledone.com. A correct diagnosis helps you make an informed decision about your irrigation system.